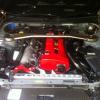
Jump to content
SAU Community

R34 Gtr Vspec Build


Recommended Posts

Hey guys,

My engine started playing up at the end of last year after some tune and spark issues. Compression was showing that each cylinder was still making reasonably healthy compression, but there was some variation (20psi diff between highest/lowest).

So I decided to use this as an excess for a forged rebuild and to fix a few other problems with the car. However, as I don’t have the time or the knowledge I decided to look a reputable builder. Luckily, Paul (of Red R Racing fame) is a Newcastle local and after a month of two of trying, finally got hold of him for a chat. Although his reputation preceded him, I was utterly impressed with his knowledge, build history and passion for RB’s. I knew straight away I’d come to the right person.

After a talk with Paul – here’s what I pencilled down for the build

  • Stock block – dipped, prepped, grouted and machined
  • Red R racing 8.5L baffled sump
  • Nitto/JE 86.5mm pistons
  • ACL race series bearings
  • Stock crank, grub screwed and balanced
  • Stock rods, tested, prepped and balanced
  • ARP rod bolts
  • N1 water pump
  • Nitto oil pump
  • Full nitto gasket kit
  • Ross 1500hp balancer
  • New Nissan head/intake/exhaust studs
  • Red R racing modified CAS sensor
  • Red R racing oil catch can/washer bottle combo
  • Adjustable cam gears
  • Gates timing belt kit
  • Tomei 260/9.15 type poncams
  • Tomei type B valve springs, retainers & valve sleeves
  • Yellow jacket coilpacks (I have a spare set of splitfires on standby)
  • Twin 2860-5’s
  • mines triple flow cam baffles
  • r34 n1 exhaust manifold
  • r34 vspec dumps
  • some sort of exhaust
  • some sort of clutch
  • some sort of legal intake system

In addition to that, the car was already equipped with a twin entry ARC 4” I/C and nismo oil cooler

The set-up listed is pretty well proven and with Paul’s expertise, I hope to maximise the -5 potential. However, I’m not really targeting a power figure (it would be nice to crack 400awkw to join the club lol), just a very reliable built engine that will pass engineering with minor adjustments.

I also bought the car with a few known problems (it was an impulse bought cheapie, but predominantly suited for what I was after), so while it’s off the road, I’ll be getting these fixed/changed

  • 4wd – car has been runing in rwd, which made driving in the wet interesting. The transfer clutch plates or atessa is the suspected problem here
  • Spigot bearing grinding when clutch is disengaged
  • Clutch slipping slightly in 1st when cold
  • Rusted rear diffuser brackets.
  • Crappy vacuum line setup and some funny wiring in the engine bay.
  • A few hoses/joiners showing there age.
  • The rims are held on by an M36 bolt, and basically need a rattle gun to take off.

Here’s some photos of the car

IMG_0046.jpg

IMG_0864.jpg

IMG_0865.jpg

IMG_0866-1.jpg

Pics & progress to follow soon once mods approve thread.

Cheers,

Joel

  • Like 1
Link to comment
Share on other sites

Thanks mod’s for approving :-)

Firstly, I should explain that I’m running this build in ~3 stages

  1. Engine build & tune
  2. Cosmetic refresh (touch-up to paint, rims, nismo MFD etc– generally stuff to make the car look the way I’m hoping it will go)
  3. Refine (A few things that I want to add to the car at a later date)

I’m moving to Perth shortly, so ‘stage 1’ as such is getting done in Newcastle, and everything else once I’m settled in Perth. One good thing about moving to WA is that if I don’t crack 400kw*** on a NSW dyno, I’m virtually guaranteed to crack it on a WA dyno lol.

***TBH I’m not expecting to crack 400awkw on this build (only running 98 at this stage), but I intend to have the build done right to support 400awkw. It’s just a number for bragging rights and I recon I’ll be pretty ecstatic with whatever I get.

Righto, now that that’s covered; its engine out time:

Start with the intake piping. As you can see the, silicon joiners (blue & greeny things) on the ARC hard piping kit look a little aged. I measured these up and sent the dimensions off to Mike @ Williams race services (SAMCO dealer) in QLD for new ones to be made. The pipes themselves will get a respray.

IMG_0881.jpg

I got a little surprise when I exposed the rear turbo inlet pipe – A previous owner had installed hiclones. I couldn’t think of better way to restrict the flow to the turbo...

IMG_0882.jpg

Some weird voltage stabiliser in the engine bay. The case look like it had been hit with a hammer wtf?

IMG_0883.jpg

There goes my tidy garage

IMG_0889.jpg

It was about this time, Paul turned up and my nice slow pace of recording everything went to shit and made way for Pauls rattle gun. Turns out it’s much faster to remove an engine with a Paul Diemer and a rattle gun.

Oh no! Something’s missing. After two afternoons of bleeding, grunting and sweating, engine & gearbox were finally out.

IMG_0932.jpg

We found some parts on the car during disassembly that I didn’t know I had –

  • Nismo clutch master cylinders
  • HKS dump pipes
  • A few ARC (Auto Refine Co not ARC brazing) suspension components
  • Nismo short shift kit
  • There was one or two other things, but they have slipped my mind.

Paul deserves a massive thanks for giving me a hand with removing the engine. I virtually had no idea, and would have been there for weeks if it wasn’t for him.

  • Like 1
Link to comment
Share on other sites

Nice build thread mate and best of luck ! Where did you source your bonnet from if you dont mind me asking ??

Thanks mate,

The last owner gave it to me when i bought the car. It had a 'mines' sticker on the box, but AFAIK 'mines' didn't make bonnets. I haven't really looked for markings on the bonnet itself, but will do when i get a chance and i'll let you know.

The only reason the carbon one is on the car is that some dipshit key'd the stockie and i don't mind the look :-)

Link to comment
Share on other sites

Cheers mate. I think the carbon looks really good on white and silver 34's, mine being a BB I am looking to get it painted to match body colour as i think the carbon looks abit tacky on it and doesnt do it much justice as opposed to the lighter coloured models where it creates an agressive looking contrast.

I have a very similar build to yours (almost identical just different brand names for certain items lol) when i went through a forged rebuild of my motor about a year ago. You should get power out of her very easy. 400awkw would be abit hard on 98octane but the motor your building will handle the power all day every day :)

Link to comment
Share on other sites

Someone also asked me about the rims in another thread...

They are the original Impul supercast rims designed specifically for the r34 GTR. They are 18x10 and use an adater plate to convert the hubs from a 5 bolt to single M36 nut lock. The Nut has both a left and right handed thread component to prevent loosening.

As far as i know, they only made a handful of sets and i've only ever come across one other set for sale.

http://www.driftworks.com/forum/parts-sale-private-sales/79310-impul-m20-center-lock-10x18-alloys.html

Unfortunatly, i'm missing all the impul tools that can be seen in that add and three of the rims are gutter rashed. I plan to get them fixed up eventually, but i've got my eye's set on getting a set of TE37SL's or LGMT4's in Black early next year.

Link to comment
Share on other sites

Cheers mate. I think the carbon looks really good on white and silver 34's, mine being a BB I am looking to get it painted to match body colour as i think the carbon looks abit tacky on it and doesnt do it much justice as opposed to the lighter coloured models where it creates an agressive looking contrast.

I have a very similar build to yours (almost identical just different brand names for certain items lol) when i went through a forged rebuild of my motor about a year ago. You should get power out of her very easy. 400awkw would be abit hard on 98octane but the motor your building will handle the power all day every day :)

Good choice with painting it! And your right, some cars pull it off, others look wrong! The R34 photo thread has some good BB examples with the same bonnet!

I cant wait to see this thing in person :D

Link to comment
Share on other sites

Cheers mate. I think the carbon looks really good on white and silver 34's, mine being a BB I am looking to get it painted to match body colour as i think the carbon looks abit tacky on it and doesnt do it much justice as opposed to the lighter coloured models where it creates an agressive looking contrast.

I have a very similar build to yours (almost identical just different brand names for certain items lol) when i went through a forged rebuild of my motor about a year ago. You should get power out of her very easy. 400awkw would be abit hard on 98octane but the motor your building will handle the power all day every day :)

Exactly. midnight purple also pulls it off, but to get the best out of BB, it has to be painted. I think i will eventually get mine sprayed when i get the orginal bonnet fixed - I havn't decided yet.

Do you have a build thread or a dyno graph - would love to have a look.

Yeah 400awkw is more of a wish then anything - just to say i've done it. There are plans to go E85 though....

Link to comment
Share on other sites

Unfortunately no build thread, should have made one coming to think of it as the car started its life virtually as a stocker and transformed greatly in the time I have owned it.

I have an old dyno sheet somewhere that I will try dig up, was extremely conservative and running low boost levels, rich and timing on 0. Still made 337awkw though. Car is off the road atm waiting for a new clutch to arrive from Japan so once that gets sorted out its going in for a slightly more agressive retune on higher boost and adjustable cam gears. I will be pretty shocked if it doesnt hit 350-60awkw on 20psi.

You can still get to the 400 on pump, just add some Toluene and up the boost :P

Link to comment
Share on other sites

Lol I like the sound of that. I’ve still got some toluene floating around in the lab at work.

Around 360awkw seems to be norm for -5's, so it will be good when you get there. Adjustable gears will help alot.

What clutch are you getting?

And while we’re on the topic– my clutch & flywheel were pulled off the engine – Clutch tuned out to be an Exeddy Carbon-D twin plate and billet fly wheel in very good condition. This explained the 1st gear slipping sometimes when the engine was cold.

I’m pretty ecstatic this clutch is in a good condition. It felt awesome to drive with, so I’m glad I don’t have to get rid of it. However, I’ve sent it to Jim Berry to work his magic to ensure it’s up to scratch for the expected major increase engine torque.

Also, the gearbox/transfer case was dropped into Terry @ Award Gearbox & Diff for a full rebuild. The gearbox/TC didn’t really need attention other than the spigot bearing and TC clutch plates, but figured it made sense to give the whole thing a re-fresher for peace of mind.

Also, some parts have also started to arrive at Paul’s - Tomei pon cams, springs etc and the -5’s.

IMG_1176_zps9ece2340.jpg

Edited by wedge_r34gtr
Link to comment
Share on other sites

Another Update

Engine has been stripped. Paul reports 3 pistons had some cracking (2, 5 & 6). Everything else was in pretty good knick.

The turbo’s had almost zero play in the shafts and no damage to the blades. Not bad for 11 yr old ceramic turbs – and good to know the car hadn’t been flogged to death via over-boosting.

Paul’s been working on an early 90’s v6 Camry and found, with a bit of experimenting, that GTR exhaust manifolds are virtually a direct bolt on for this engine. So my old turbo’s have already found a new home. Torque steer anyone?

No photos as I’m away for work.

Link to comment
Share on other sites

Well the head & block have been sent off for crack testing and machining. In the meantime, Paul’s been keeping busy by starting some fab work for the car

Oil catch can – no idea why it’s in his bathroom.

IMG_1178_zps4d58d176.jpgIMG_1179_zps57d1cfe1.jpg

IMG_1177_zps5a47c71e.jpg

Upgrading the stock sump to a 9L pan.

IMG_1172_zpsbf82139b.jpg

Paul also bought a new polisher – he wanted something to try it on….I now have a polished race pan sump.

IMG_1171_zps1e234f17.jpg

I forgot about the last two screws in my coil cover last year when I was changing my spark plugs and broke the end off – so I got Paul to fix this too. Covers will be getting repainted in a TBD colour.

IMG_1182_zpsf2a61f8f.jpg

IMG_1181_zps053da0da.jpg

Meanwhile, I was back from work and I started fiddling with the engine bay. Front bar off.

IMG_0948_zps6c8a1944.jpg

Everything’s pretty dirty and needs a good clean. The holes in the reinforcing bar are for the ‘mines’ cooling vents

Vspec GTR’s are pretty low – especially with the ohlins/nismo coilovers, and unfortunately the diffuser & front bar cops a hiding if the car bottoms out. This bumper had been repaired before and although I’ve been careful, it has started to crack on the sides again. Also one of the mines vents has cracked- not sure how this happened.

P1000559_zps46721b47.jpg

P1000569_zpsa876a8b3.jpg

P1000566_zpsd9481066.jpg

P1000567_zps9ccfc580.jpg

P1000562_zps2ce20f56.jpg

I had a chat with Peter @ bodyformaero about fixing the bar. He believed the bar would be repairable, but due to the (lack of) height, I would be better off with a new one to prevent the cracking from re-occurring. Due to funds and time, this will have to wait to next year. No Biggy.

Anyway, I removed the intercooler and dropped it off at Pauls for a hydrofluoric acid clean. The initial clean with a decent degreaser actually brought the IC up quite nice.

IMG_1169_zps43c5745f.jpg

I also removed the HKS’s BOV’s and have sourced the stock BOV re-circulation system off an r33 gtr to replace them with.

Edited by wedge_r34gtr
Link to comment
Share on other sites

thought about going a bit further with the transfer case? if they're pulling it apart etc, would be a great time to add another plate or two for better response when power is switching from back to front - fantastic mod by all accounts

Link to comment
Share on other sites

thought about going a bit further with the transfer case? if they're pulling it apart etc, would be a great time to add another plate or two for better response when power is switching from back to front - fantastic mod by all accounts

One step ahead of you :-).

Paul & terry both mentioned the mod, and after a bit of research i found pretty much what you've said. By all accounts the mod helps alot with the torque transfer and essential makes the car more snappy pulling out of corners.

If i remember correctly there going to change it from a 7 plate (4 thick/3 thin) setup to a 11 plate (all thin) set-up. I don't know the exact dynamics of it, so that what i've just said could be wrong.

Link to comment
Share on other sites

Another update while i'm online:

So I’ve decided I’m not happy with the ARC intake box. It’s a great looking box, but I feel the design has the same flaw as pods – sucks in hot air from the engine bay. I thought about designing my own box similar to the ARC, but with an idea I’ve had for a cold air intake; but I really don’t have the time to stuff around and feel the money would be better off spent elsewhere. I may look at doing this design next year for a bit of R&D.

IMG_0879_zpsc4a56c08.jpg

So anyway - I’ve sourced a stock r34 gtr box and snorkel in excellent condition. I’m a little worried the stock snorkel may be restrictive with -5’s, so I’ve also ordered a nismo R-tune intake (apparently 25% better flowing – I will try to test this back to back on the dyno if time permits) and will be ordering either a nismo or K&N filter. I’m also a little worried about the clearance over the 52mm radiator, but I’ll deal with this when the time comes.

Next up on my list of things to do was to sort the exhaust. I originally planned to use my current 3” Futjitsubo Titanium catback with a set of mines style front pipes and high flow cat, but after going through all the -5 results I could find, it seemed the best results always occurred with a 3.5”+ full exhaust. So after looking around and finding no off the shelf equal length front pipes that merged into a 3.5”plus that were to my liking, I decided to go custom and I gave Paul a ring…

He’d been working on his mates VL Calais and he had produced some pretty impressive pipe work with that:

http://www.calaisturbo.com.au/showthread.php?t=250231

Also, he’d made a few 4” exhausts for a couple of guys on here with good results (NYTSKY (Dave) rings a bell – someone can correct me if I’m wrong). So full 4” stainless it was with a custom cat and equal length twin 2.75” to 4” front pipes with V-band joiners. Paul hadn’t made an equal length twin system, but was willing to give it a try…

The results are looking favourable:

IMG_1139_zps87c5bc7e.jpg

IMG_1138_zpscbeae5d7.jpg

IMG_1133_zpsa732b037.jpg

IMG_1132_zps2987837b.jpg

IMG_1128_zpsafa3a29a.jpg

IMG_1127_zps28901f14.jpg

Paul says he usually does 2 or 3 prototypes before his happy with a product, but these just look sex. He did say he won’t be totally satisfied till there fitted and clearance checked… To be honest the photo’s don’t really do this justice and for a first attempt, it is just superb.

Link to comment
Share on other sites

Create an account or sign in to comment

You need to be a member in order to leave a comment

Create an account

Sign up for a new account in our community. It's easy!

Register a new account

Sign in

Already have an account? Sign in here.

Sign In Now
 Share


×
×
  • Create New...