Jump to content
SAU Community

Fix Your R34Gtr Mfd Multifunction Display Lcd


Chris-06R
 Share

Recommended Posts

Posted this up a few days ago in Tutorials/DIY but it seems no mods are around there, so I'll put it in here for now...

Ok, so the R34 GTR is now getting on a bit in terms of age and one of the things that doesn't last the test of time and the elements is the LCD screen on the multi-function display (MFD).

This was the case with mine - as you can see in the pictures below it was all cracked around the edges and was really annoying me.

IMG_40259web.jpg

IMG_40263web.jpg

So I started looking into what the reason for the cracking was and what options I had to fix it. After doing some forum research I found out that the problem is the polarising film on the front of the LCD cracks (due to heat/uv whatever) and this is what ruins the screen. There are 2 options -

1) Replace the screen with a brand new one - ~$200? (if you can find the right screen)

2) Attempt to replace the polarising film ~$20

I decided I'd have a crack at replacing the polarising film and after doing it I'd highly recommend if you have the same problem as me, follow my tutorial and do it yourself. Its just as much effort to replace the whole screen and is a whole lot more expensive. Even if you do have a go at replacing the film and you ruin your screen you aren't any worse of than you were before and you can replace the whole screen.

Before you begin you're going to need a sheet of the LCD polarising film. I bought the stuff from this place - http://www.3dlens.co...cdpolarizer.php and bought a 17inch piece and just cut it to size (which was good because I stuffed it up the first time and I had heaps left over to have another go). This is the film -

IMG_40291web.jpg

The other thing you will need for this job (apart from tools) is double sided tape - not the thick mounting stuff, the stuff that is just thin film between protective paper.

Ok, so once you have your supplies, you need to remove the MFD from the car.

Start off by pulling out your ashtray and unscrewing the one screw behind it. You should then be able to unclasp your gear stick boot and pull the whole plastic surround out. You will need to unclip the cigarette lighter.

IMG_40268web.jpg

Next, pull out the center air vent. Do this by carefully wedging a thin flat head screwdriver down the left hand side of the vent, and popping it out. I found using two works best - wedge one at the top and then use a second at the bottom and it will pop out. Unclip your hazard lights switch and pull it out.

IMG_40270web.jpg

Once you have the center vent out the plastic surround for the MFD will lift out of the way revealing the 4 hex head screws you will need to undo. Because they are near the winscreen you will probably need a stubby screwdriver, or, if they are as tight as the ones in my car were, and ratchet, socket and short extension.

Next, undo the 2 or 3 plugs on the back of the mfd - the brown and white ones need to have the little tab in the middle of the plug pushed down to pull them out. Levering them out carefully with a flat bladed screwdriver is the way to go.

IMG_40274web.jpg

Once undone, you can pull the whole unit out and move to somewhere more comfortable.

IMG_40275web.jpg

From memory, i think there's 4 more screws you now need to undo to open up the unit. See all that stuff in there - that's why your home-made mfd never worked!

IMG_40278web.jpg

Ok, so you'll need to pull the ribbon out (by lifting the plastic clasp up) and also pull out the plug the blue wires are connected to. This will seperate the screen cradle from the rest of the unit.

IMG_40279web.jpg

Next, remove the screen from the cradle. Again the screws were super tight (I managed to destroy the head of one of them and had to cut a new groove with a hacksaw to get it out) so make sure you have a good quality, appropriately sized screwdriver to get them out.

Once out, you will need to remove the rigid plastic piece that is glued/taped onto the screen. Carefully run a knife around the edge making sure not to push the blade in too far.

IMG_40284web.jpg

Once the plastic piece is off the cracked polarising film is revealed. Clean the remaining sludge off the metal frame with the knife.

IMG_40286.jpg

Next, CAREFULLY, use the blade of a knife to lift the corner of the cracked adhesive film off the screen. It's stuck down pretty good and is quite hard to get it started so be patient. If you're not careful you will damage the actual screen itself like I did - if you only take a notch out of the corner it doesn't matter too much as you won't even be able to see it once you put it all back together.

IMG_40288web.jpg

IMG_40290web.jpg

Now I thought I'd go check I had the right film and that I hadn't damaged my screen up until this point, so I went and plugged it back into the car -

hmm.. so the polarising film is obviously important...

IMG_40292web.jpg

... and putting it the wrong way round won't help (don't worry it can only go on sticky side down)

IMG_40293web.jpg

that's it...

IMG_40294web.jpg

Ok, so with a sharp stanley knife cut your film to exactly the right size, peel off the protective film on the sticky side, and stick it down. I did this bit twice cos I ended up with a bubble the first time so I recommend sticking one edge down with the film bent and gradually laying it down onto the screen. If you screw it up you should be able to peel it back off carefully, cut a new piece of film and try again. Once on, peel the coating off the front of the film, line the metal frame with some new double sided tape and stick down the thick plastic piece: *make sure you put it back on the right way with the matt finish to the outside*

IMG_40298web.jpg

Put the whole thing back together again, unless yours is like mine and has fallen to bits as you pulled it apart. The plastic is really brittle and breaks very easily - araldite it all back together and nobody will over know.

IMG_40301web.jpg

Install it all back in the car whilst trying to beat my time of around 6 minutes to put the screen, screws and all the trim back in. Check out your good-as-new screen and post up your before and after photos in this thread :)

IMG_40314web.jpg

  • Like 1
Link to comment
Share on other sites

subscribed

mine don't have this issue... but it is a 2000 model car so just a matter of time

by the way, what year is your car... i know that the screen went from sharp one to Toshiba in mid 2000 model and onwards

but not sure exactly when... mine is Feb 2000 model

Link to comment
Share on other sites

  • 3 weeks later...

Umm, I think it was just the standard one, but you could use either on that page. I'd imagine the anit-glare just has a matt finish but the front plastic element on the screen has that anyway.

Link to comment
Share on other sites

  • 2 weeks later...

My screen which is also a Sharp only has a white screen appearing and nothing else. Pulled it apart and one of the ribbon cables were a little burnt on the connector, not sure how this is happening. Looking for a replacement cable but hard to find, not sure if the cable is the issue or the actual screen.

Any ideas???

Link to comment
Share on other sites

Hmm check none of the pins are bent causing a short circuit/burning but I'd say something is fried. I'm pretty sure the ribbon cable should be pretty simple to get but it sounds like you might need a whole new screen

Link to comment
Share on other sites

Umm, I think it was just the standard one, but you could use either on that page. I'd imagine the anit-glare just has a matt finish but the front plastic element on the screen has that anyway.

Thanks Chris for taking the time to put the pictures up, just ordered the film but was wondering what the double sided tape looks like/is called and where did you buy it from.

Thanks Ian

Link to comment
Share on other sites

double sided tape was just standard bunnings issue stuff... make sure you don't get 'mounting' type which is a foam type.

As for replacement screens - not sure what modern equivalents are around but if you can't find anything here yahoo japan might be worth looking at.

Link to comment
Share on other sites

  • 11 months later...

Have had this saved as a link for quite some time. Will definately need it one day.

Fantastic tutorial with all the detail thats required, thanks for taking the time to do it.

If I may ask, how is the quality of the replacement film?

Does it have the same matt finish as the stock one, or is it glossy? Also is the screen just as clear with the replacement?

Thanks.

Link to comment
Share on other sites

Hi Mate,

I replaced the film on my screen soon after i bought the car.

The result is fantastic, the screen is like new and yes it does have the factory matte finnish.

Cheers.

Link to comment
Share on other sites

No probs for the tutorial - I figure it will get more and more popular over time.

Yep, the matte finish is actually created by the plastic cover, not the film itself - Just make sure you put it back on the same way as it came off (as I mention above)

Link to comment
Share on other sites

  • 3 weeks later...

http://i23.photobuck...MG_40314web.jpg

How do you get that to show all about the car, can you have that open on any LCD type or does it need to be a specific type?

The V-spec and V-Spec ii had more sensors around the car and thus the MFD showed more. If you have a 99 Model car you just get the basic ones. Your other option is to upgrade to the NISMO MFD software and you get the sensor with it to show everything.

(Plz correct me if I'm wrong anyone)

Link to comment
Share on other sites

  • 5 weeks later...

Create an account or sign in to comment

You need to be a member in order to leave a comment

Create an account

Sign up for a new account in our community. It's easy!

Register a new account

Sign in

Already have an account? Sign in here.

Sign In Now
 Share


  • Latest Posts

    • Yeah, I get that. I try to be as cost-efficient as possible with cars, and typically prefer to buy them at the bottom of their depreciation curve. I was looking at those Bilsteins too as they're roughly in the same price bracket as the BC's - lack of adjustability and being soft put me off, not that I want anything too hard. That's my issue with the Skyline, it's too expensive and it's reflected in my driving. I don't mind going full pelt as long as there's a gravel trap to catch me. Really, proper safety equipment is needed for total confidence. Well this just turned up for the BMW. I'll try and get the front together tomorrow and take some pics of the absolutely horrid rear end; perhaps I'll have a crack at the rear on Wednesday. I need to make the car drivable before the weekend as I'll be driving it over to London.    
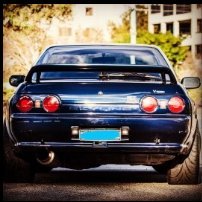
    • Hi SAU community  Wondering what my 93 Very RARE TH1 Blue R32 GTR VSpec is worth these days?? Build is fairly dated now All Mods are Compliance Approved  Runs RB26 done only 10000ks Greddy T88 done only 8000ks HKS Cam 1000cc Injectors Full Titanium Exhaust Nismo Intercooler Nismo Oil Cooler HKS Oil sump Tein Super Street Coils Cusco Sway Bars RAYS TE37 19x10.5 DYNO street tune makes around 700hp on 98octane  
    • It does sound like a fuse considering the indicators work..I’ll triple check when I’m free and report back.    thanks for the reply.
    • no, the car was a manual 5 speed from the factory and still is.
    • While going through data logs late last week, I spotted a small issue with my WMI. My WMI starts to progressively inject at 11psi of boost. I'm using a 25psi cut in pressure switch on my WMI as an added safety and if the curve is linear, I should hit that 25psi on my WMI system around 13-14psi of boost.  As per my data logs, my WMI pressure switch only activates around 19psi of boost. This is causing my non WMI 4D map to trim for WMI. I'm presuming this is caused by the mechanical switch response time, injection curve not being linear or both.  I ordered a 2-10psi adjustable cut in pressure switch which should correct this. If this doesn't resolve it before my dyno appointment on Friday, I'll just remove the pressure switch temporarily and more than likely replace it with a pressure transmitter afterwards.    BTW Speedtek has yet to refund me.
×
×
  • Create New...